
ESP32-Ethernet-Kit
Support for for Espressif ESP32-Ethernet-Kit
Related Boards
Support for for Espressif ESP32-Ethernet-Kit @author Gunar Schorcht gunar@schorcht.net @author Erik Ekman eekman@google.com
\section esp32_ethernet_kit Espressif ESP32-Ethernet-Kit
Overview
The Espressif ESP32-Ethernet-Kit is a development board that uses a ESP32-WROVER module (-B or -E depending on version). Most important features of the board are
- 100 Mbps Ethernet via IP101G PHY
- USB bridge with JTAG interface
Furthermore, some GPIOs are broken out for extension. The USB bridge based on FDI FT2232HL provides a JTAG interface for OCD debugging through the USB interface.
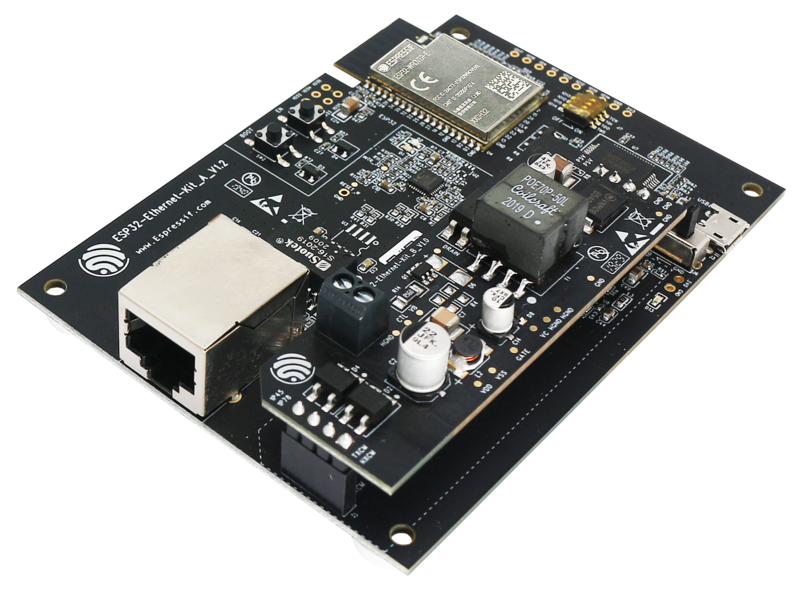
There are different revisions of the board:
- boards_esp32_esp-ethernet-kit-v1_0
- boards_esp32_esp-ethernet-kit-v1_1
- boards_esp32_esp-ethernet-kit-v1_2
Hardware
MCU
Most features of the board are provided by the ESP32 SoC. For detailed information about the ESP32, see section esp32_mcu_esp32 “MCU ESP32”.
Board Configuration
ESP32-Ethernet-Kit has the following on-board components
- 100 Mbps Ethernet via IP101G PHY
- USB bridge with JTAG interface
For detailed information about the configuration of ESP32 boards, see section Peripherals in esp32_riot.
The board is available in different versions. See the per-version file for details.
Flashing the Device
Flashing RIOT is quite straight forward. The board has a Micro-USB connector with reset/boot/flash logic. Just connect the board using the programming port to your host computer and type:
BOARD=esp32-ethernet-kit-v1_X make flash ...where X is the minor revision number of the board.
The USB bridge is based on FDI FT2232HL and offers two USB interfaces:
- the first interface is the JTAG interface for On-Chip debugging
- the second interface is the console interface, which is also used for flashing
Therefore, it might be necessary have to declare the USB interface in the make
command. For example, if the ESP32-Ethernet-Kit is connected to the host
computer through the USB interfaces /dev/ttyUSB0 and /dev/ttyUSB1, the make
command would be used as following:
BOARD=esp32-ethernet-kit-v1_X PORT=/dev/ttyUSB1 make flash ...Please note that /dev/ttyUSB1 is used as the console port by default.
Therefore the variable PORT only needs to be defined if the console port is
another port.
For detailed information about ESP32 as well as configuring and compiling RIOT for ESP32 boards, see esp32_riot.
On-Chip Debugging with the Device
Since the USB bridge based on FDI FT2232HL provides a JTAG interface for debugging through an USB interface, using ESP32-Ethernet-Kit is the easiest and most convenient way for On-Chip debugging. Please refer the [ESP-IDF Programming Guide] (https://docs.espressif.com/projects/esp-idf/en/latest/esp32/api-guides/jtag-debugging/index.html) for details on how to setup and how to use ESP32-Ethernet-Kit and OpenOCD.
To use the JTAG interface, the esp_jtag module must be used to disable the
SPI_DEV(0) which normally uses the GPIOs for the JTAG signals.
USEMODULE=esp_jtag make flash BOARD=esp32-ethernet-kit-v1_X ...Furthermore the function switches (DIP switches) for the JTAG signals must be set to ON.
To flash and debug using OpenOCD, the precompiled version of OpenOCD for ESP32 has to be installed using the install script while being in RIOT’s root directory, see also section [Using Local Toolchain Installation] (#esp32_local_toolchain_installation).
dist/tools/esptool/install.sh openocdBefore OpenOCD can then be used, the PATH variable has to be set correctly
and the OPENOCD variable has to be exported using the following command.
. dist/tools/esptool/export.sh openocdOnce the PATH variable and the OPENOCD variable are set, OpenOCD can be used
-
to flash the application using command
Terminal window PROGRAMMER=openocd USEMODULE=esp_jtag make flash BOARD=esp32-ethernet-kit-v1_X ... -
to start a debugging session (the board will be reset, but not flashed) using command
Terminal window PROGRAMMER=openocd USEMODULE=esp_jtag make debug BOARD=esp32-ethernet-kit-v1_X ...
by setting the PROGRAMMER variable to openocd.
Note: Even if the JTAG interface is used for debugging, the ESP32 standard
method for flashing with esptool.py can still be used. In that case, the
flash target is made without setting the PROGRAMMER variable.