Setup Development Environment
Choosing the Right Operating System
Section titled “Choosing the Right Operating System”Linux (Recommended)
Section titled “Linux (Recommended)”Most of the RIOT OS developers are using Linux on their development PCs, so you can expect the most streamlined experience here. Generally, most Linux distributions are supported.
If you are new to Linux, we recommend using Ubuntu, as it is the most widely used distribution and has the most extensive documentation and community support.
Some distributions, such as Fedora, do not provide the necessary packages for cross compilation. In this case, it is recommended to use the RIOT Docker Container.
Windows
Section titled “Windows”Windows is supported through Windows Subsystem for Linux (WSL). The experience is not as streamlined as on Linux, but it is still possible to develop with RIOT.
Native development on macOS machines is not officially supported.
What works well is using Linux in a virtual machine, but at much lower performance than running Linux natively.
We also offer Docker images that make it a bit easier to develop on macOS.
Installing the Required Software Packages
Section titled “Installing the Required Software Packages”Depending on the operation distribution you are using, the installation of the required software packages may vary.
Ubuntu
Section titled “Ubuntu” sudo apt install make gcc-multilib python3-serial python3-psutil wget unzip git openocd gdb-multiarch esptool podman-docker clangd clangArch Linux
Section titled “Arch Linux” sudo pacman -S make gcc-multilib python-pyserial python-psutil wget unzip git openocd gdb esptool podman-docker clangThis will show something like this depending on your distribution:
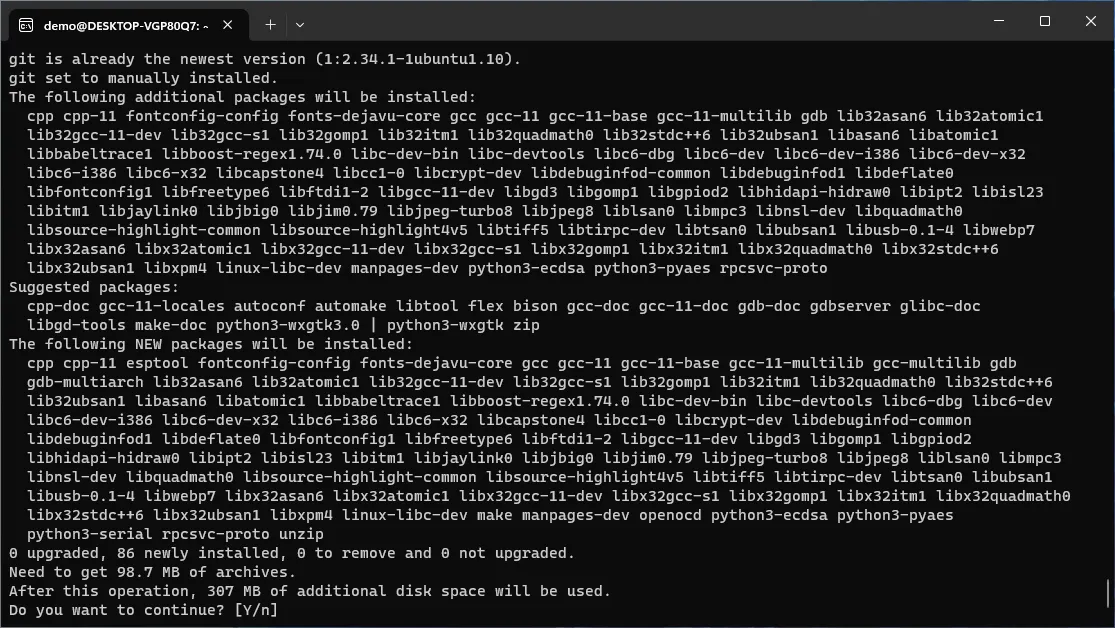
- Confirm the installation by hitting the return-key
- The installation process will take some time
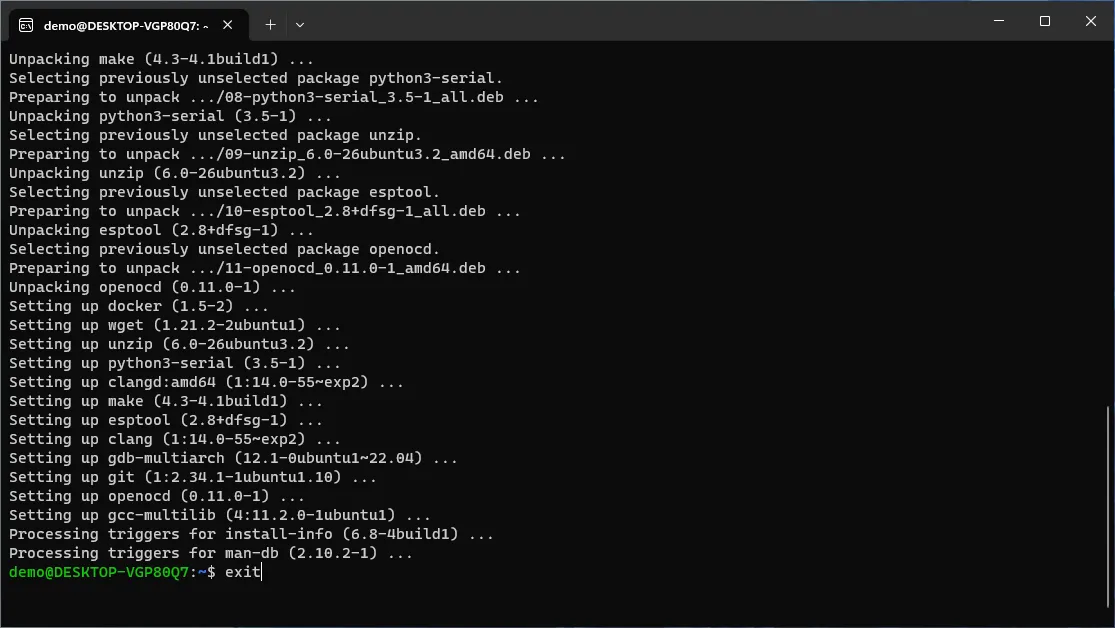
- Eventually the output will look like below (except for the
exit)
Cloning the RIOT Repository and First Steps in the Terminal
Section titled “Cloning the RIOT Repository and First Steps in the Terminal”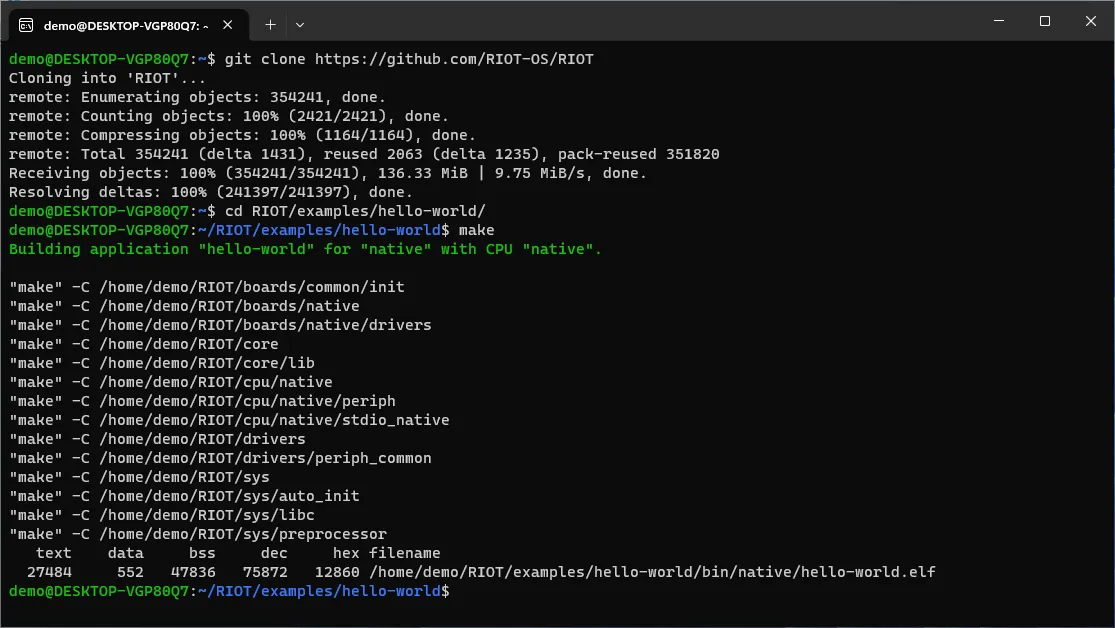
- Open the terminal.
- Type
git clone https://github.com/RIOT-OS/RIOTand confirm with the return-key - This may take some time. Eventually, it will print
done.when it completed - Type
cd RIOT/examples/basic/hello-worldand confirm with the return-key to enter the folderhello-worldexample app in the RIOT repo - Type
makeand confirm with the return key to build the app for the boardnative
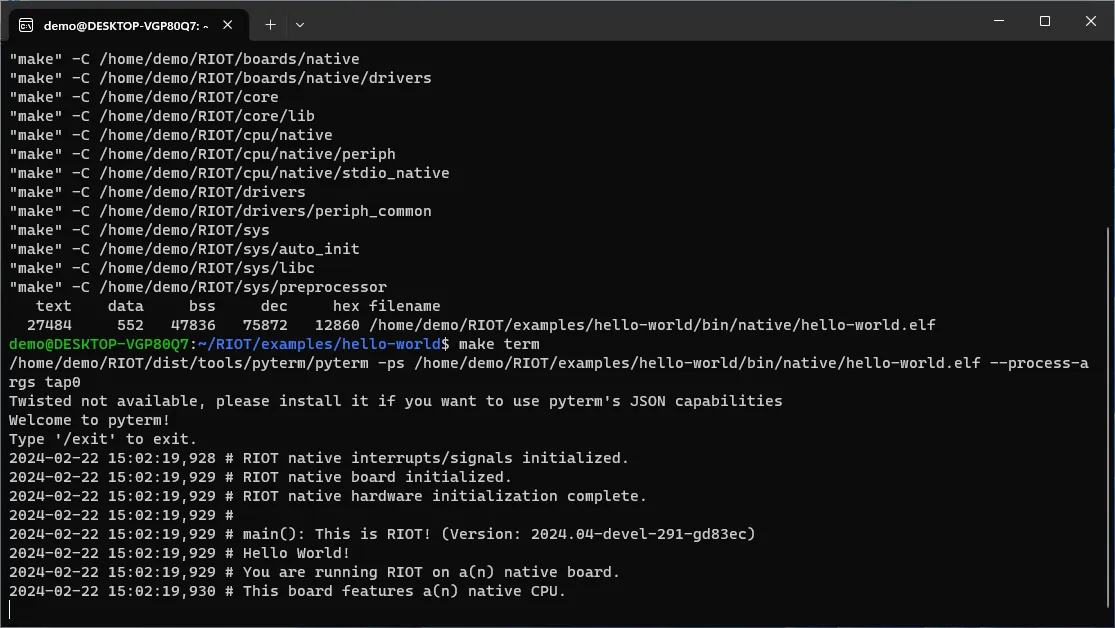
- Now run the application by executing
make term - The output should look similar to the screenshot above
- You can close the terminal by:
- Press and hold the
Ctrl-key - With the
Ctrl-key still held, press theC-key - Release both keys
- Press and hold the
Generating compile_commands.json e.g. for Code Completion in IDEs
Section titled “Generating compile_commands.json e.g. for Code Completion in IDEs”This target will honor the variables controlling the build process such as BOARD, TOOLCHAIN,
DEVELHELP, etc. just like the usual build process. This works without actual compilation. By
default, the compile_commands.json is placed in the RIOT base directory. This behavior can be
overwritten using the COMPILE_COMMANDS_PATH variable by specifying the full absolute path
(including file name) of the compile_commands.json instead.
Using VS Code for Development
Section titled “Using VS Code for Development”- If not already open, open the terminal
- Confirm that the terminal is pointed to the folder
~/RIOT/examples/basic/hello-world- The blue part left of the prompt (the
$sign in the terminal) shows the current working directory for the terminal - If the blue string is not
~/RIOT/examples/basic/hello-world, typecd ~/RIOT/examples/basic/hello-worldto enter that path
- The blue part left of the prompt (the
- Inside
~/RIOT/examples/basic/hello-worldrun the commandmake compile-commands - The output should look like below
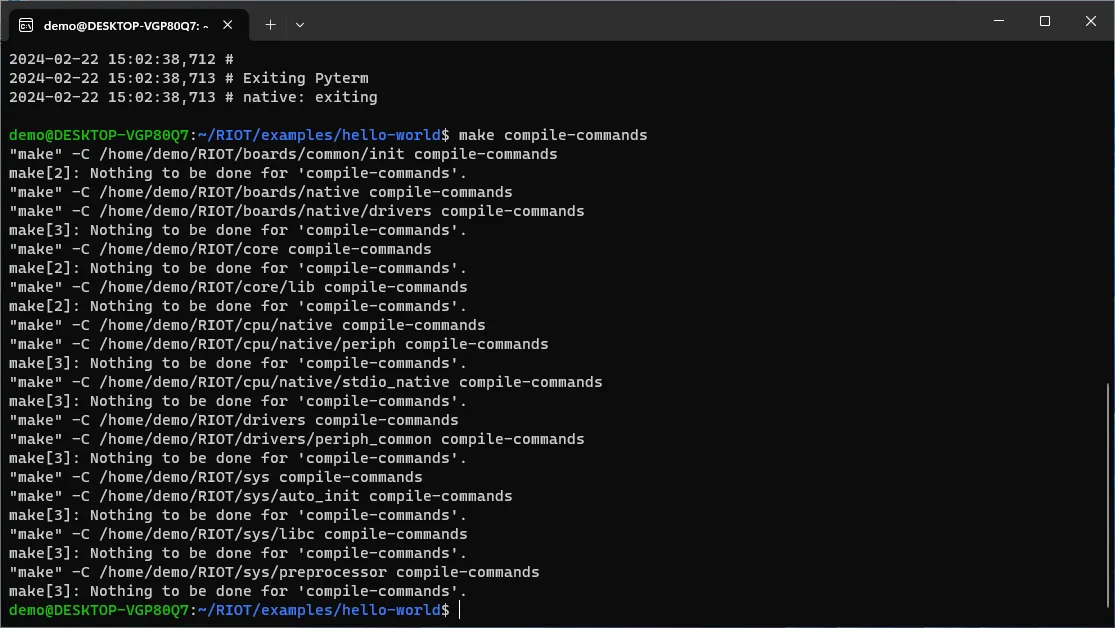
- Navigate back to
~/RIOTusing the commandcd ~/RIOT - run
code .to launch VS Code- This will take a bit longer on the first launch
- Eventually, a VS Code Window should pop up that looks like this:
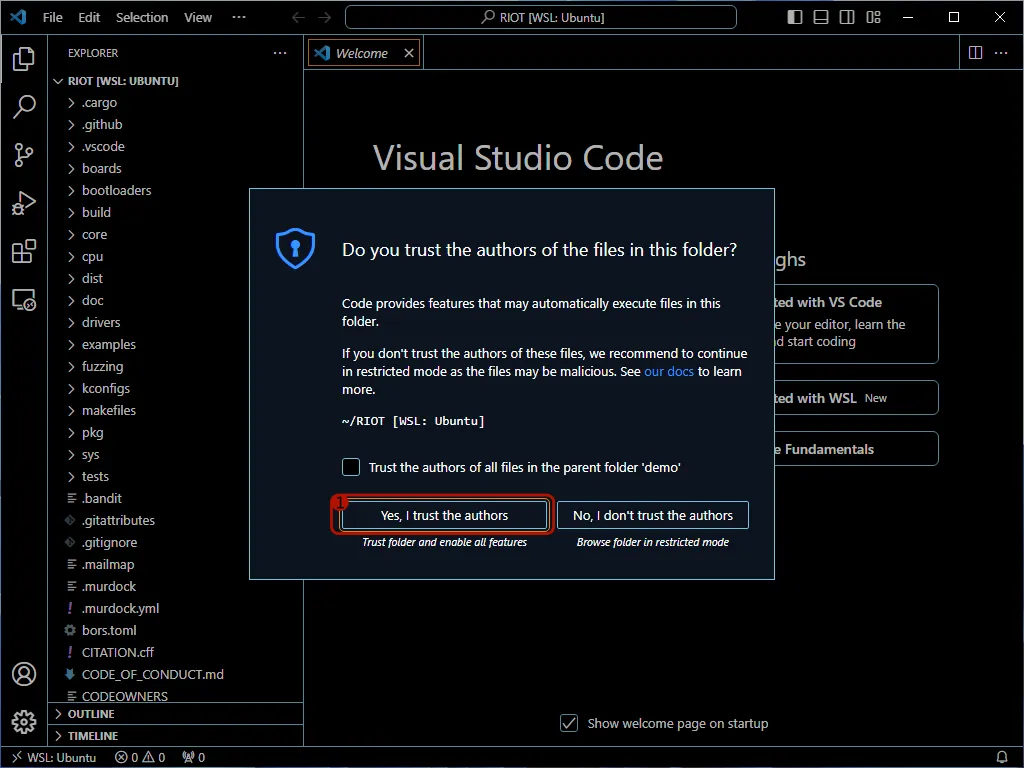
- Click on “Yes, I trust the authors”
- Now, use the tree view in the left and open the
examplesfolder - Open the
basicfolder inside theexamplesfolder - Open the
hello-worldfolder inside thebasicfolder - Open the
main.cfile in thehello-worldfolder withinexamples - The file should open and look like this:
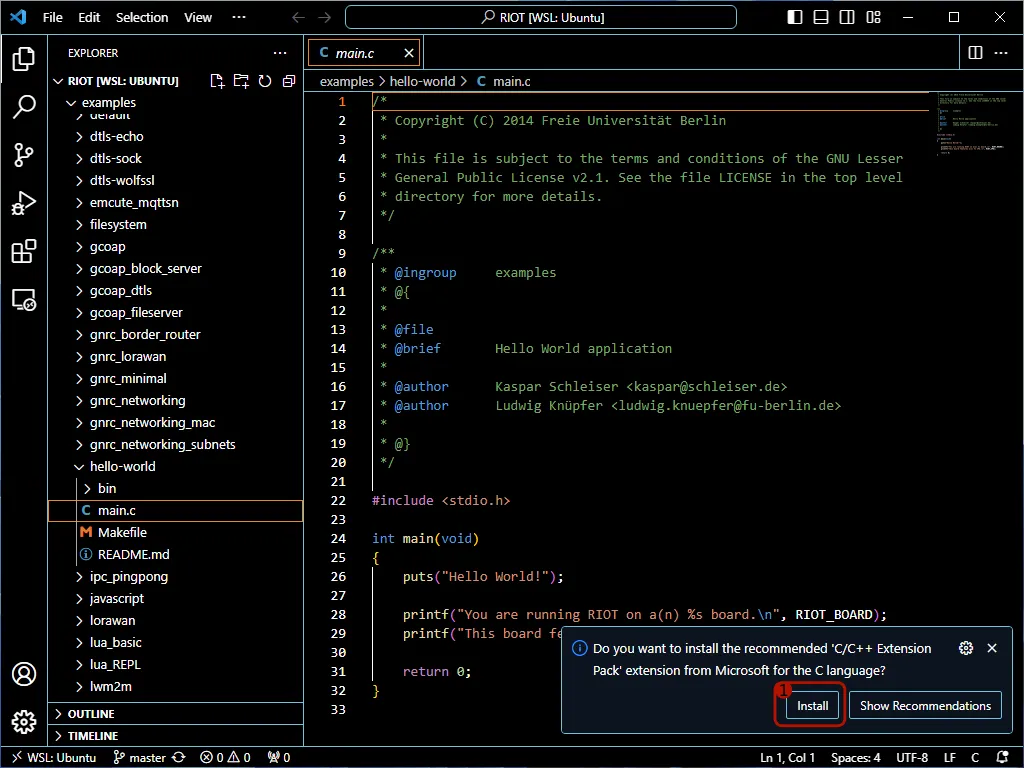
- Click on the “Install” button when prompted to install the C/C++ Extension.
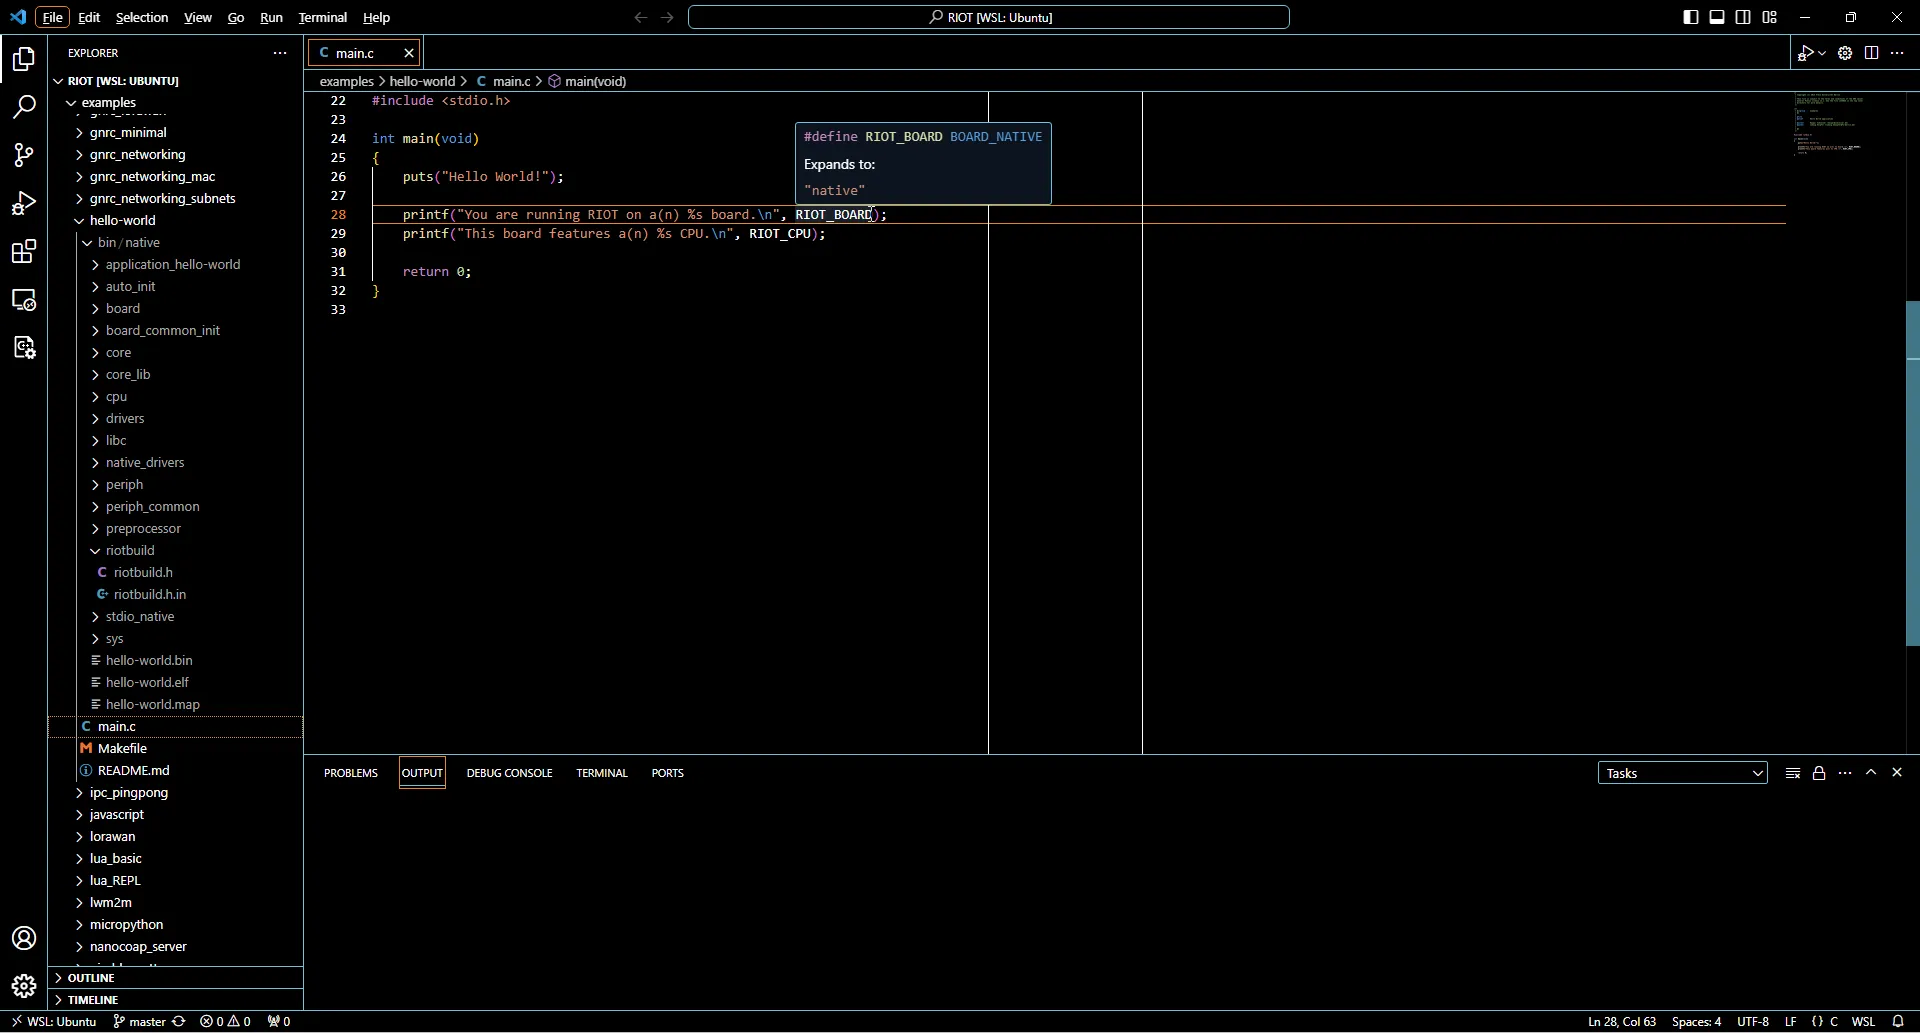
- Confirm that when hovering over
RIOT_BOARDin the source code, IntelliSense shows that it expands to"native".
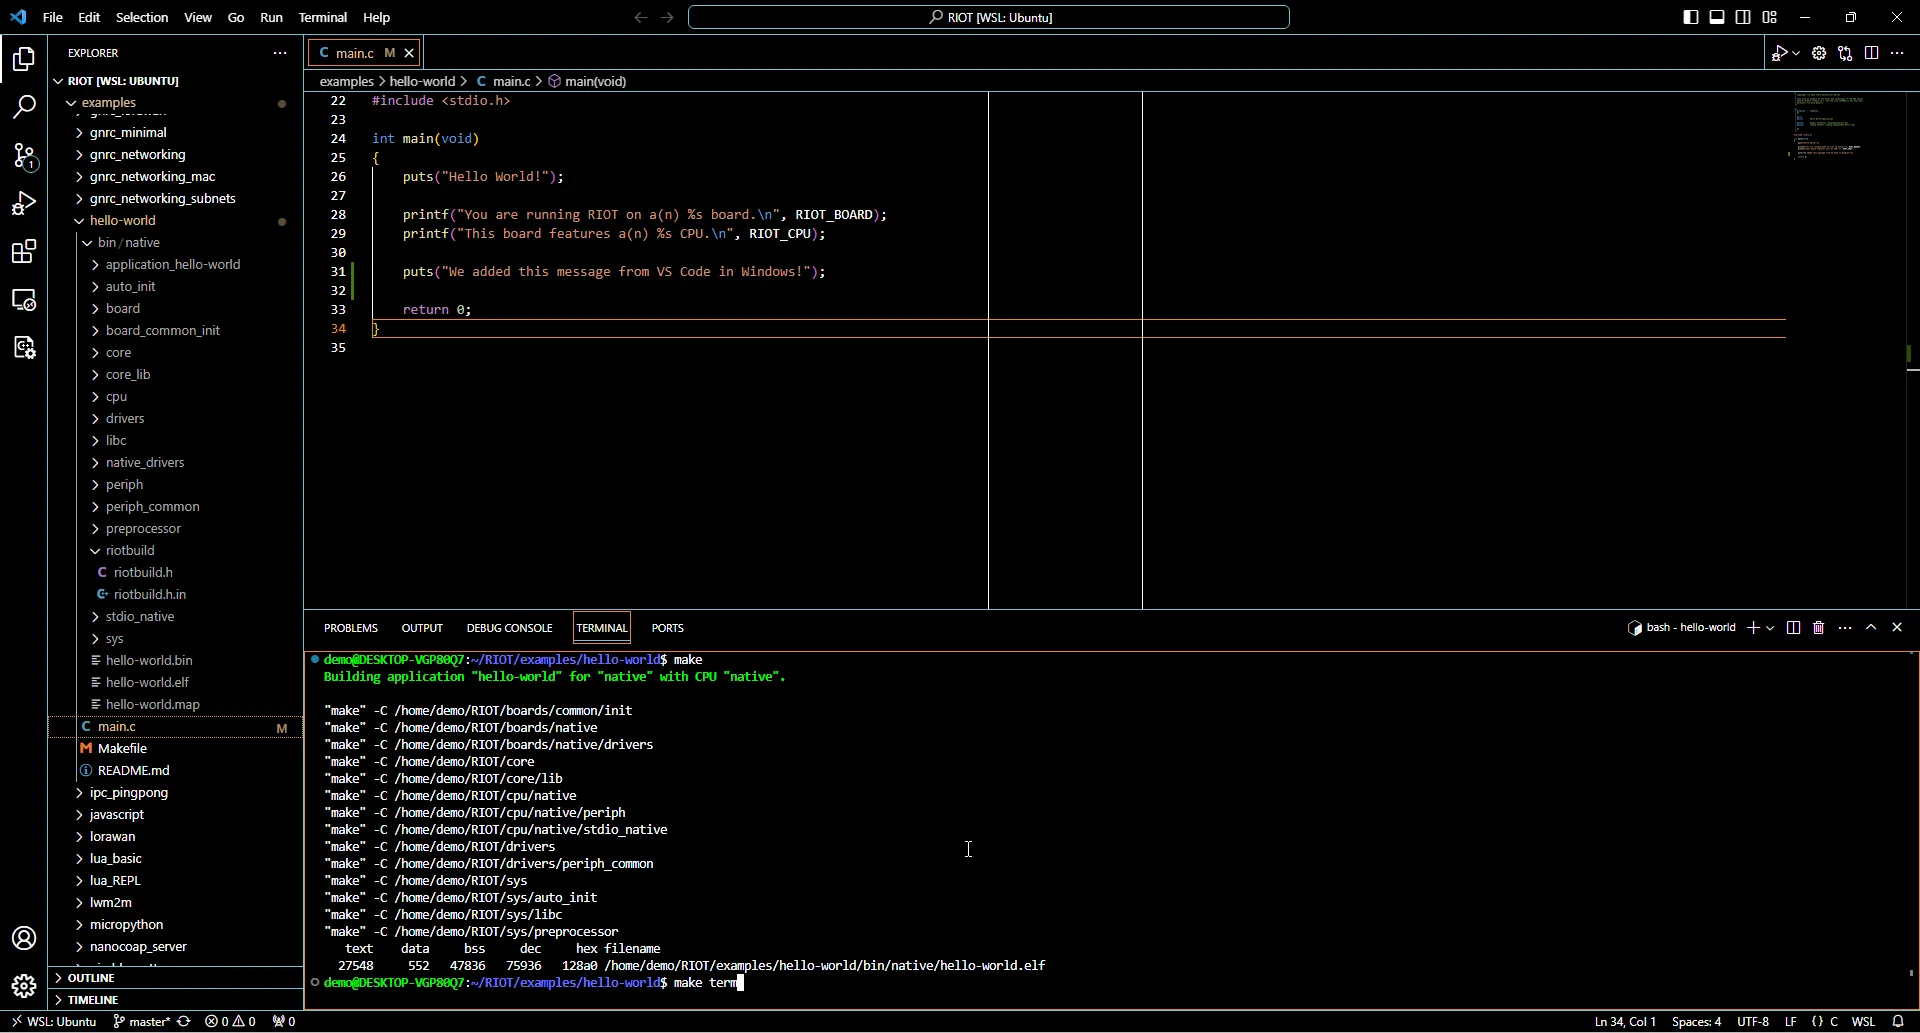
- Extend the message to be printed, e.g. by adding a
puts("...");statement in the source code - Save the modified source code (e.g.
Ctrl+S) - Open the integrated terminal by clicking on the terminal tab at the bottom
- Navigate to
~/RIOT/examples/basic/hello-worldusingcd ~/RIOT/examples/basic/hello-world - Run the
makecommand to build the code - Run make
make termto launch the application - The result should look like:
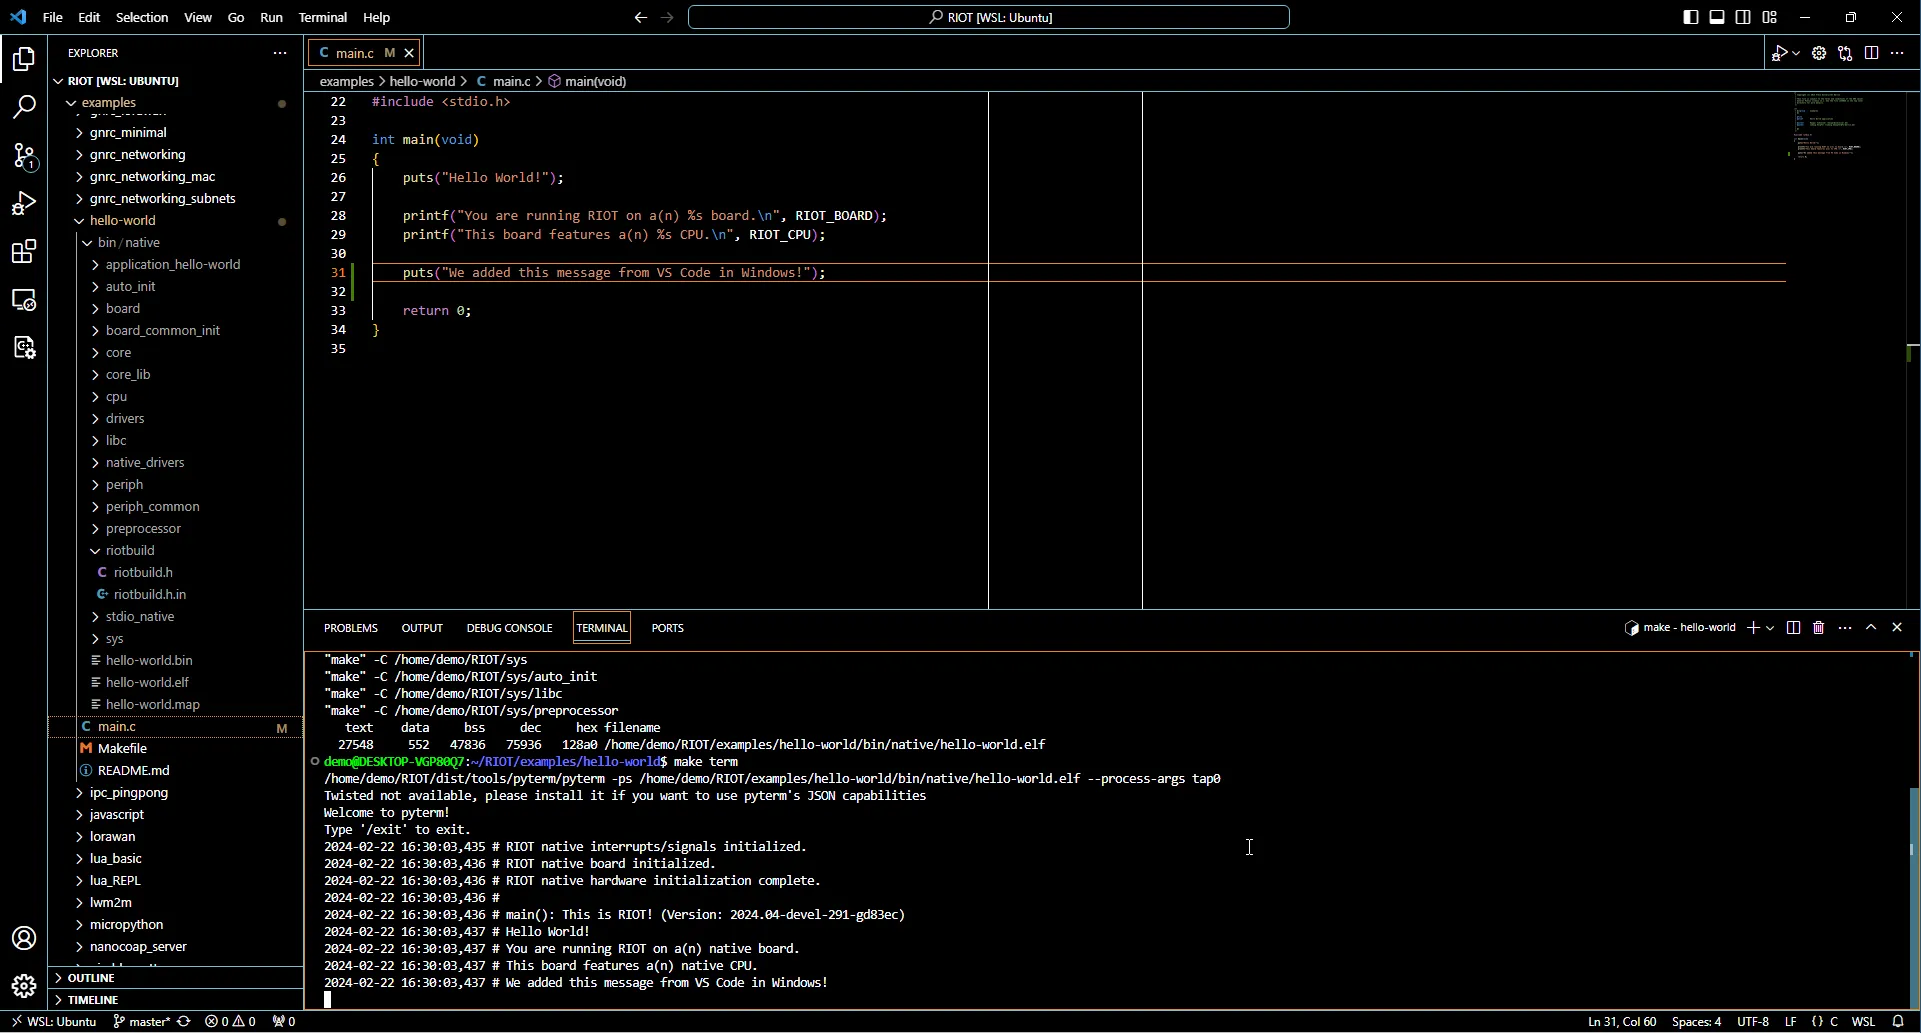
Congratulations! You just compiled your first RIOT application. To run RIOT on real hardware, proceed with the next to sections.
Architecture Specific Requirements
Section titled “Architecture Specific Requirements”For each architecture a default tool for flashing and on-chip debugging is listed below - in most cases OpenOCD. However, some boards use different tools, e.g. because a bootloader is installed that allows flashing via the serial interface. Check the board documentation for any details on this. If that documentation contains no info about a flashing tool, the default tool for its architecture is used.
Architecture: ARM7 and ARM Cortex M*
Section titled “Architecture: ARM7 and ARM Cortex M*”- GCC, binutils, and newlib for
arm-none-eabi- Alternatively: Install docker and export
BUILD_IN_DOCKER=1
- Alternatively: Install docker and export
- OpenOCD for debugging/flashing (most boards)
- Some boards use UF2 based bootloaders, which require auto-mounting to work with
make flash - Some boards default to using J-Link for flashing/debugging. Either install that or export
PROGRAMMER=openocdto just use OpenOCD instead - installation instructions can be found here
- Some boards use UF2 based bootloaders, which require auto-mounting to work with
- Optional: picolibc for
arm-none-eabito link against picolibc instead of newlib - Optional: clang to build with
TOOLCHAIN=llvm - Optional: GDB multiarch for debugging
- If no multiarch package is available, use GDB for
arm-none-eabiinstead
- If no multiarch package is available, use GDB for
Architecture: Xtensa
Section titled “Architecture: Xtensa”- Toolchain for ESP32
- esptool for flashing
- Optional: OpenOCD and GDB (multiarch version) for debugging via JTAG
ESP8266
Section titled “ESP8266”- Toolchain for ESP8266
- esptool for flashing
- Optional: GDB (multiarch version) for debugging via the gdbstub interface for the ESP8266
Architecture: AVR
Section titled “Architecture: AVR”- GCC and binutils for AVR and avrlibc
- Alternatively: Install docker and export
BUILD_IN_DOCKER=1
- Alternatively: Install docker and export
- avrdude for flashing
- Optional: AVaRICE and GDB (multiarch version) for debugging
Architecture: RISC-V
Section titled “Architecture: RISC-V”- GCC, binutils, and newlib for RISC-V (target triple should start with
riscvand end with-none-elfor-unknown-elf. Note that most packages are multilib, e.g.riscv64-unknown-elfwill likely work fine for 32 bit RISC-V boards)- Alternatively: Install docker and export
BUILD_IN_DOCKER=1
- Alternatively: Install docker and export
- OpenOCD for debugging/flashing (some new boards might require a patched version of OpenOCD or a recent build from the git sources)
- Optional: picolibc to link against picolibc instead of newlib (recommended)
- Optional: clang to build with
TOOLCHAIN=llvm - Optional: GDB multiarch for debugging
Architecture: MSP430
Section titled “Architecture: MSP430”- GCC, binutils, and newlib for MSP430
- Alternatively: Install docker and export
BUILD_IN_DOCKER=1
- Alternatively: Install docker and export
- mspdebug for flashing/debugging
- Optional: MSP Debug Stack for additional board support
- Optional: GDB multiarch for debugging
Architecture: native
Section titled “Architecture: native”- On 64 bit systems: multilib versions for your host compilers, standard C library, and development
headers
- Alternatively: Compile with
BUILD_IN_DOCKER=1. Note that for running the executable you still need a multilib system (or 32 bit Linux) with glibc a standard C library.
- Alternatively: Compile with
- A C library supporting the deprecated POSIX.1-2001 ucontext library (e.g. glibc, FreeBSD’s libc)
- Optional: GDB for debugging. (Prefer the multiarch version, this will also work for other boards)