Creating a Project
Step 1: Create a new Project
Section titled “Step 1: Create a new Project”This tutorial assumes that you have already set up your development environment as described in the Getting Started guide.
Create a new Git Repository
We start by creating a new git repository for our project. If you have never worked with git before, you can find a good introduction here or here.
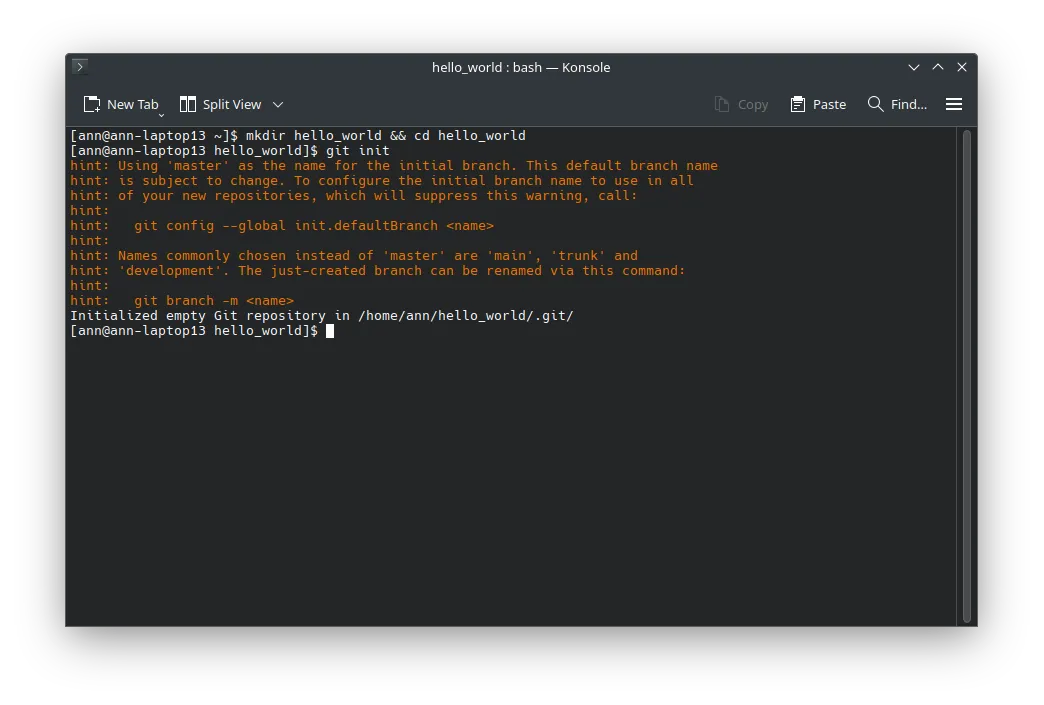
Let’s create a new directory for our project in which we will store our code. We will call this directory hello_world.
mkdir hello_world && cd hello_worldNext, we initialize a new git repository in this directory. This will allow us to track changes to our code and collaborate with others and also allows us to easily get RIOT as a submodule.
git init
Congratulations! You have now created a new empty git repository. In the next step, we will add RIOT as a submodule to our project.
Add RIOT as a Submodule
We want to import RIOT as a submodule to our project. This will allow us to easily update to newer versions of RIOT and also allows us to easily share our project with others on GitHub, Gitlab, or any other git hosting service.
To add RIOT as a submodule, we use the following command:
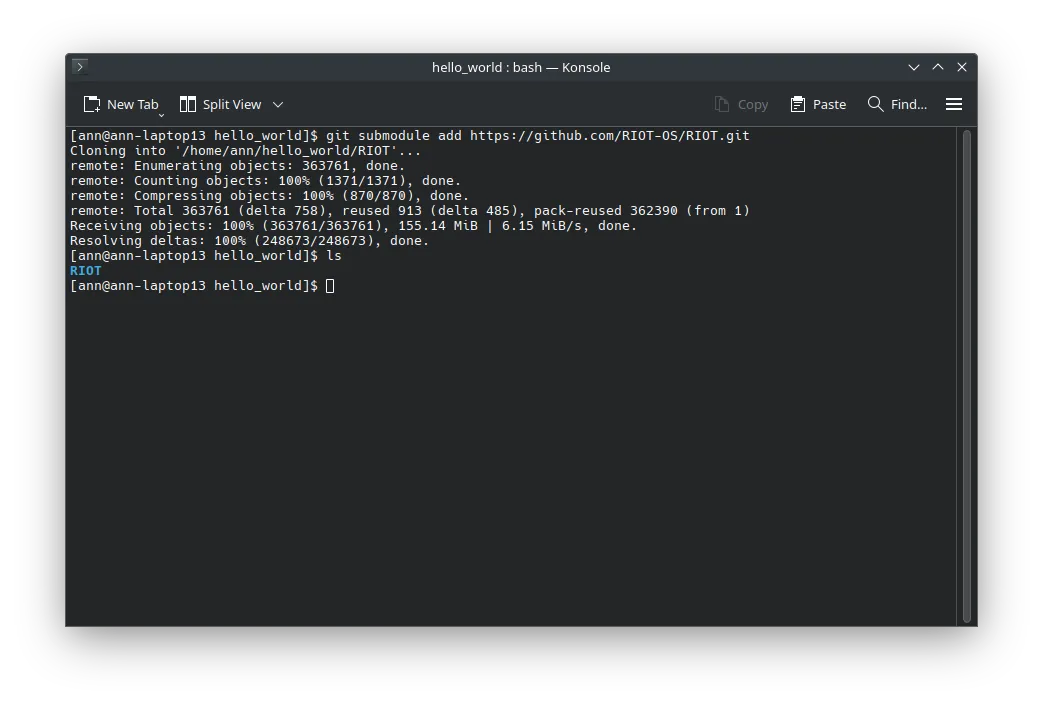
git submodule add https://github.com/RIOT-OS/RIOT.git
When looking into our directory via ls, we can see that a new directory called RIOT has been created. This directory contains the RIOT source code. If you were to push your project to a git hosting service, the RIOT directory would not be included in the repository. Instead, the repository would contain a reference to the commit of the RIOT repository that you have added as a submodule. This way, the repository stays small and only contains the code that you have written and not the entire RIOT source code.
Remember that you need to clone your own repository with the --recursive option to get the submodule as well.
git clone --recursive https://git.example.com/your/repo.gitAlternatively if you have already cloned your own repository, you can run the following command to initialize and update the submodule:
git submodule update --init --recursiveYour folder should look like this now:
Directoryhello_world
DirectoryRIOT/
- …
Open VS Code
Section titled “Open VS Code”Now that we have added RIOT as a submodule to our project, we can start writing our hello world program. You can use any text editor to create this file. We will use Visual Studio Code in this example. To open Visual Studio Code in the directory, you can use the following command:
code .Step 2: Initialize Rust
Section titled “Step 2: Initialize Rust”Now that Visual Studio Code is open, we need to tell Rust what kind of project we want to create. We do this by running the following command in the terminal:
cargo new hello_world --libThis command creates a new project called hello_world with a library crate type.
The --lib flag tells Rust that we want to create a library crate instead of a binary crate.
A library crate is a collection of functions and types that can be used by other programs,
while a binary crate is an executable program.
RIOT then calls our main function when the program starts.
You should now have 3 new files within your project directory:
Cargo.toml: This file contains metadata about your project and its dependencies.src/lib.rs: This file contains the source code for your library crate.Cargo.lock: This file contains information about the exact versions of your dependencies.- This file is automatically generated by Cargo and should not be edited manually so don’t worry about it for now.

Step 3: Creating the Makefile
Section titled “Step 3: Creating the Makefile”Now that we have created our hello world program,
we need to create a Makefile to build our program.
The Makefile is a build automation tool
that allows us to define how our program should be built.
We create a new file called Makefile in the root directory of our project
and add the following code:
# name of your applicationAPPLICATION = hello-world
# The name of crate (as per Cargo.toml package name, but with '-' replaced with '_')## The presence of this triggers building Rust code contained in this# application in addition to any C code.APPLICATION_RUST_MODULE = rust_hello_world
# If no BOARD is found in the environment, use this default:BOARD ?= native
# If you want to build in a Docker container, set this to 1.# This is useful if you want to build on a system that does not have the# RIOT toolchain installed, or if you want to ensure that the build is# reproducible.BUILD_IN_DOCKER ?= 1
# This has to be the absolute path to the RIOT base directory:RIOTBASE ?= $(CURDIR)/../../../..
# Comment this out to disable code in RIOT that does safety checking# which is not needed in a production environment but helps in the# development process:DEVELHELP ?= 1
# Change this to 0 show compiler invocation lines by default:QUIET ?= 1
include $(RIOTBASE)/Makefile.includeNow RIOT knows that you want to build a Rust application
and will use the hello_world crate as the main module.

Step 3: Adjusting the Cargo.toml
Section titled “Step 3: Adjusting the Cargo.toml”Next, we need to adjust the Cargo.toml file to tell Cargo that we want to build for RIOT.
Open the Cargo.toml file and replace its contents with the following:
[package]name = "hello-world"version = "0.1.0"edition = "2021"
[lib]crate-type = ["staticlib"]
[profile.release]# Setting the panic mode has little effect on the built code (as Rust on RIOT# supports no unwinding), but setting it allows builds on native without using# the nightly-only lang_items feature.panic = "abort"
[dependencies]riot-wrappers = { version = "0.9.1", features = [ "set_panic_handler", "panic_handler_format" ] }
rust_riotmodules = { path = "./RIOT/sys/rust_riotmodules/" }
The most important part here are the dependencies.
As mentioned in Rust in Riot,
riot-wrappers is a crate that provides a set of wrappers around
RIOT’s C functions to make them usable from Rust in a safe way.
The other configuration options are not that important for now, but you can read more about them in the Cargo documentation.
IDE Setup
Section titled “IDE Setup”Due to the way the RIOT Rust integration works, you need to amend your normal Rust setup in your IDE to make it work with RIOT. Luckily RIOT provides a small makefile command that will help you with that. Run the following command in your terminal:
make info-rustThe output will look something like this:
[ann@ann-laptop13 rust01-hello-world]$ make info-rustcargo versioncargo 1.81.0 (2dbb1af80 2024-08-20)c2rust --versionC2Rust 0.19.0To use this setup of Rust in an IDE, add these command line arguments to the `cargo check` or `rust-analyzer`: --profile releaseand export these environment variables: CARGO_BUILD_TARGET="thumbv7em-none-eabihf" RIOT_COMPILE_COMMANDS_JSON="/home/ann/projects/exercises/rust01-hello-world/bin/feather-nrf52840-sense/cargo-compile-commands.json" RIOTBUILD_CONFIG_HEADER_C="/home/ann/projects/exercises/rust01-hello-world/bin/feather-nrf52840-sense/riotbuild/riotbuild.h"You can also call cargo related commands with `make cargo-command CARGO_COMMAND="cargo check"`.Beware that the way command line arguments are passed in is not consistent across cargo commands, so adding `--profile release` or other flags from above as part of CARGO_COMMAND may be necessary.Add the environment variables to your shell configuration file for this project
or use the make cargo-command command to run cargo commands with the correct arguments.
In VSCode you can now go to the workspace settings .vscode/settings.json
and add the following settings:
{ "rust-analyzer.cargo.extraArgs": [ "--profile", "release" ], "rust-analyzer.cargo.target": "thumbv7em-none-eabihf",}Step 4: Writing the Hello World Program
Section titled “Step 4: Writing the Hello World Program”We are nearly done with setting up our project. The last thing we need to do is
to write the actual hello world program.
Open the src/lib.rs file and replace its contents with the following code:
#![no_std]
use riot_wrappers::riot_main;use riot_wrappers::println;
extern crate rust_riotmodules;
#![no_std] tells the Rust compiler that we are building a program
that does not depend on the standard library,
which is not available on the hardware we are targeting.
This does mean that we can’t use some of the standard library features
like std::io or std::collections, however,
there are a lot of no_std compatible crates available that provide similar functionality,
including riot-wrappers 😉
After that we import the functions that we will soon use to print to the console.
The riot_main macro helps RIOT figure out what our main function is
and println is a macro that we can use to print to the console,
this replaces the println! macro from the standard library,
since, as mentioned before, we can’t use it on embedded systems.
Now we need to actually write the main function.
Add the following code to the src/lib.rs file:
riot_main!(main);
fn main() {    println!(        "You are running RIOT using Rust on a(n) {} board.",        riot_wrappers::BOARD    );}
Congratulations! You have now created your first Rust program for RIOT. 🎉
Step 5: Building the Program
Section titled “Step 5: Building the Program”To build our program, we use the following command:
make flashAfter building the program, we can run it using the following command to start the RIOT shell:
make termYou should see the following output:
You are running RIOT using Rust on a(n) native board.
Conclusion
Section titled “Conclusion”In this tutorial,
you have learned how to create a new Rust project for RIOT and how to build and run it.
You have also learned how to write a simple hello world program in Rust
and how to use the riot-wrappers crate to interact with RIOT’s C functions.